
NodeJS, Reactjs, Web Development
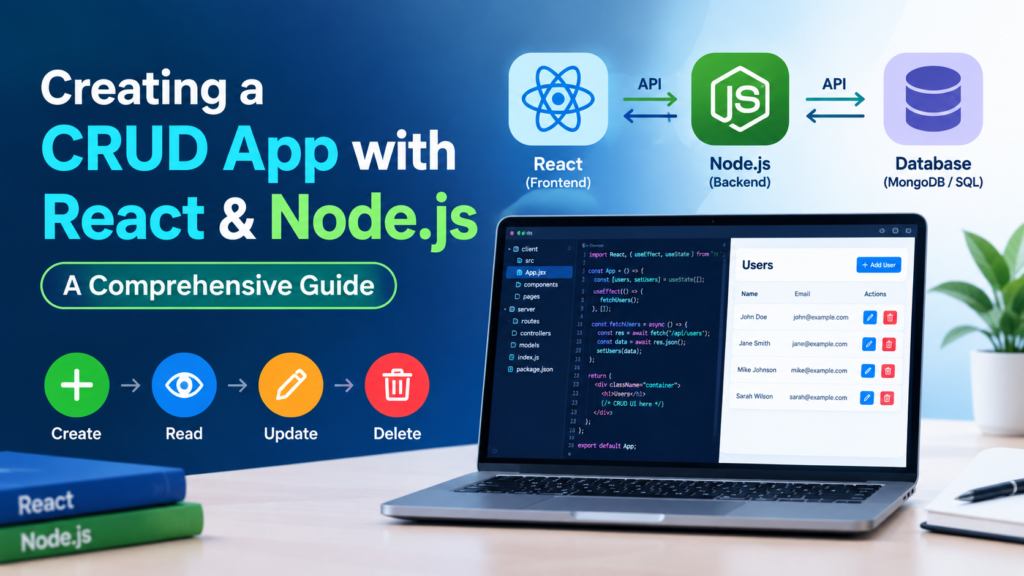
Creating a CRUD App with React and Node.js: A Comprehensive Guide
Jul
Building a full-stack web application is an excellent way to understand how modern frontend and backend technologies work together. One of the best beginner-to-intermediate projects is a CRUD application—an app that allows users to Create, Read, Update, and Delete data.
In this guide, we’ll build the architecture for a CRUD application using React.js on the frontend, Node.js and Express.js on the backend, and MongoDB as the database.
Whether you’re building a task manager, employee management system, product catalog, or customer dashboard, the same CRUD principles can be applied to many real-world applications.
What Is a CRUD Application?
CRUD stands for:
- Create – Add new records
- Read – Retrieve and display records
- Update – Modify existing records
- Delete – Remove records
For example, consider a simple product management application:
| Operation | Example |
|---|---|
| Create | Add a new product |
| Read | Display all products |
| Update | Change product information |
| Delete | Remove a product |
A typical full-stack CRUD application consists of three main layers:
React Frontend
      ↓
REST API
      ↓
Node.js + Express
      ↓
MongoDB Database
React handles the user interface, Node.js and Express manage the API, and MongoDB stores the application data.
Technologies Used
For this project, we’ll use:
React.js
React is a JavaScript library for creating interactive user interfaces. It is particularly useful for building component-based single-page applications.
Node.js
Node.js allows JavaScript to run on the server. It is commonly used for building APIs and backend services.
Express.js
Express is a lightweight Node.js framework that simplifies API development, routing, middleware, and HTTP request handling.
MongoDB
MongoDB is a NoSQL database that stores information in flexible JSON-like documents.
Mongoose
Mongoose provides an object modeling layer that makes it easier to work with MongoDB from Node.js.
Project Structure
A simple project can be organized like this:
crud-app/
│
├── backend/
│   ├── models/
│   │   └── Product.js
│   ├── routes/
│   │   └── productRoutes.js
│   ├── server.js
│   ├── package.json
│   └── .env
│
└── frontend/
    ├── src/
    │   ├── components/
    │   │   ├── ProductForm.jsx
    │   │   └── ProductList.jsx
    │   ├── App.jsx
    │   └── main.jsx
    ├── package.json
    └── index.html
Separating the frontend and backend makes the project easier to maintain and scale.
Step 1: Create the Backend
Create a project directory and initialize the backend:
mkdir crud-app
cd crud-app
mkdir backend
cd backend
npm init -y
Install the required packages:
npm install express mongoose cors dotenvFor development, you can also install Nodemon:
npm install --save-dev nodemonStep 2: Create the Express Server
Create a file called server.js.
const express = require("express");
const mongoose = require("mongoose");
const cors = require("cors");
require("dotenv").config();

const app = express();

app.use(cors());
app.use(express.json());

mongoose
  .connect(process.env.MONGO_URI)
  .then(() => console.log("MongoDB connected"))
  .catch((error) => console.error(error));

app.get("/", (req, res) => {
  res.json({ message: "API is running" });
});

const PORT = process.env.PORT || 5000;

app.listen(PORT, () => {
  console.log(`Server running on port ${PORT}`);
});
The express.json() middleware allows Express to process JSON request bodies.
Step 3: Configure Environment Variables
Create a .env file:
MONGO_URI=mongodb://127.0.0.1:27017/crudapp
PORT=5000
If you’re using a hosted MongoDB service, replace the local connection string with your database connection URL.
Never commit sensitive database credentials directly to a public repository.
Step 4: Create a MongoDB Model
Create:
models/Product.jsAdd the following:
const mongoose = require("mongoose");

const productSchema = new mongoose.Schema(
  {
    name: {
      type: String,
      required: true,
      trim: true,
    },
    price: {
      type: Number,
      required: true,
    },
    description: {
      type: String,
      default: "",
    },
  },
  {
    timestamps: true,
  }
);

module.exports = mongoose.model("Product", productSchema);
This model defines the structure of our product documents.
Each product will contain:
- Name
- Price
- Description
- Created date
- Updated date
Step 5: Create CRUD API Routes
Create:
routes/productRoutes.jsAdd:
const express = require("express");
const Product = require("../models/Product");

const router = express.Router();
Create a Product
router.post("/", async (req, res) => {
  try {
    const product = await Product.create(req.body);
    res.status(201).json(product);
  } catch (error) {
    res.status(400).json({ message: error.message });
  }
});
This endpoint accepts a POST request and creates a new product.
Read All Products
router.get("/", async (req, res) => {
  try {
    const products = await Product.find().sort({ createdAt: -1 });
    res.json(products);
  } catch (error) {
    res.status(500).json({ message: error.message });
  }
});
The endpoint retrieves all products from MongoDB.
Read a Single Product
router.get("/:id", async (req, res) => {
  try {
    const product = await Product.findById(req.params.id);

    if (!product) {
      return res.status(404).json({
        message: "Product not found",
      });
    }

    res.json(product);
  } catch (error) {
    res.status(400).json({ message: "Invalid product ID" });
  }
});
This endpoint retrieves a specific product using its MongoDB ID.
Update a Product
router.put("/:id", async (req, res) => {
  try {
    const product = await Product.findByIdAndUpdate(
      req.params.id,
      req.body,
      {
        new: true,
        runValidators: true,
      }
    );

    if (!product) {
      return res.status(404).json({
        message: "Product not found",
      });
    }

    res.json(product);
  } catch (error) {
    res.status(400).json({ message: error.message });
  }
});
The new: true option ensures that the updated document is returned.
Delete a Product
router.delete("/:id", async (req, res) => {
  try {
    const product = await Product.findByIdAndDelete(req.params.id);

    if (!product) {
      return res.status(404).json({
        message: "Product not found",
      });
    }

    res.json({
      message: "Product deleted successfully",
    });
  } catch (error) {
    res.status(400).json({ message: "Invalid product ID" });
  }
});
Register the Routes
Update server.js:
const productRoutes = require("./routes/productRoutes");

app.use("/api/products", productRoutes);
Your API now has the following endpoints:
| Method | Endpoint | Purpose |
|---|---|---|
| POST | /api/products |
Create product |
| GET | /api/products |
Get all products |
| GET | /api/products/:id |
Get one product |
| PUT | /api/products/:id |
Update product |
| DELETE | /api/products/:id |
Delete product |
This is the core REST API for the CRUD application.
Step 6: Create the React Frontend
Go back to the project root:
cd ..Create a React application using Vite:
npm create vite@latest frontendChoose:
React
JavaScript
Then:
cd frontend
npm install
npm run dev
Your React development server should now start.
Step 7: Create a Product Form
Create:
src/components/ProductForm.jsxExample:
import { useState } from "react";

function ProductForm({ onProductAdded }) {
  const [form, setForm] = useState({
    name: "",
    price: "",
    description: "",
  });

  const handleChange = (event) => {
    setForm({
      ...form,
      [event.target.name]: event.target.value,
    });
  };

  const handleSubmit = async (event) => {
    event.preventDefault();

    const response = await fetch("http://localhost:5000/api/products", {
      method: "POST",
      headers: {
        "Content-Type": "application/json",
      },
      body: JSON.stringify({
        ...form,
        price: Number(form.price),
      }),
    });

    if (response.ok) {
      const product = await response.json();

      onProductAdded(product);

      setForm({
        name: "",
        price: "",
        description: "",
      });
    }
  };

  return (
    <form onSubmit={handleSubmit}>
      <input
        name="name"
        value={form.name}
        onChange={handleChange}
        placeholder="Product name"
        required
      />

      <input
        name="price"
        type="number"
        value={form.price}
        onChange={handleChange}
        placeholder="Price"
        required
      />

      <textarea
        name="description"
        value={form.description}
        onChange={handleChange}
        placeholder="Description"
      />

      <button type="submit">Add Product</button>
    </form>
  );
}

export default ProductForm;
This component collects product information and sends it to the Node.js API.
Step 8: Display Products
Create:
src/components/ProductList.jsxExample:
function ProductList({ products, onDelete }) {
  return (
    <div>
      {products.map((product) => (
        <div key={product._id}>
          <h3>{product.name}</h3>
          <p>Price: ${product.price}</p>
          <p>{product.description}</p>

          <button onClick={() => onDelete(product._id)}>
            Delete
          </button>
        </div>
      ))}
    </div>
  );
}

export default ProductList;
The component receives product data through props and renders each product.
Step 9: Connect React to the API
Update App.jsx:
import { useEffect, useState } from "react";
import ProductForm from "./components/ProductForm";
import ProductList from "./components/ProductList";

function App() {
  const [products, setProducts] = useState([]);

  const fetchProducts = async () => {
    const response = await fetch(
      "http://localhost:5000/api/products"
    );

    const data = await response.json();
    setProducts(data);
  };

  useEffect(() => {
    fetchProducts();
  }, []);

  const handleProductAdded = (product) => {
    setProducts((current) => [product, ...current]);
  };

  const handleDelete = async (id) => {
    const response = await fetch(
      `http://localhost:5000/api/products/${id}`,
      {
        method: "DELETE",
      }
    );

    if (response.ok) {
      setProducts((current) =>
        current.filter((product) => product._id !== id)
      );
    }
  };

  return (
    <main>
      <h1>Product Management</h1>

      <ProductForm onProductAdded={handleProductAdded} />

      <ProductList
        products={products}
        onDelete={handleDelete}
      />
    </main>
  );
}

export default App;
Now React retrieves products from the Node.js API and displays them in the browser.
Understanding the Data Flow
When a user creates a product, the process looks like this:
User fills out form
        ↓
React captures form data
        ↓
POST /api/products
        ↓
Express receives request
        ↓
Mongoose validates data
        ↓
MongoDB stores product
        ↓
API returns product
        ↓
React updates the interface
For retrieving products:
React application
       ↓
GET /api/products
       ↓
Express route
       ↓
MongoDB
       ↓
Product data
       ↓
React state
       ↓
User interface
Understanding this request-response cycle is fundamental to full-stack development.
Adding Update Functionality
The update process is similar to creating a product.
For example:
const updateProduct = async (id, updatedData) => {
  const response = await fetch(
    `http://localhost:5000/api/products/${id}`,
    {
      method: "PUT",
      headers: {
        "Content-Type": "application/json",
      },
      body: JSON.stringify(updatedData),
    }
  );

  return response.json();
};
After receiving the updated product, React can update its local state.
A common approach is to display an edit form when the user clicks an Edit button.
Improving Error Handling
Production applications should not assume every request will succeed.
For example:
try {
  const response = await fetch(
    "http://localhost:5000/api/products"
  );

  if (!response.ok) {
    throw new Error("Failed to fetch products");
  }

  const data = await response.json();
} catch (error) {
  console.error(error);
}
You can also display meaningful error messages to users instead of simply logging errors to the browser console.
Input Validation
Validation should be implemented on the backend even if React already validates the form.
For example:
if (!req.body.name || req.body.price === undefined) {
  return res.status(400).json({
    message: "Name and price are required",
  });
}
Server-side validation helps protect the application because API requests can be sent without using your React interface.
Security Considerations
A basic CRUD application is useful for learning, but production applications require additional security.
Consider implementing:
- Authentication
- Authorization
- Input validation
- Rate limiting
- Secure HTTP headers
- Environment variables
- CORS configuration
- Request size limits
- Database access controls
- Proper error handling
- HTTPS
Never expose database passwords, API keys, or other sensitive credentials in frontend JavaScript.
Using Axios Instead of Fetch
You can also use Axios to communicate with the API.
Install it with:
npm install axiosThen:
import axios from "axios";

const response = await axios.get(
  "http://localhost:5000/api/products"
);

console.log(response.data);
Axios can make API requests more convenient, particularly as applications become larger.
Common Problems and Solutions
CORS Error
If React and Node.js are running on different ports, the browser may block requests.
Install and configure CORS:
npm install corsThen:
const cors = require("cors");

app.use(cors());
For production, configure CORS to allow only trusted origins rather than allowing every origin.
MongoDB Connection Error
Check:
- MongoDB is running
- The connection string is correct
- Database credentials are valid
- Network access is configured correctly
- Environment variables are loaded
React Cannot Reach the API
Verify that the backend is running:
node server.jsThen check:
http://localhost:5000/You should receive:
{
  "message": "API is running"
}
Improving the Application
Once the basic CRUD functionality works, you can add more advanced features.
Search
Allow users to search products by name or description.
Pagination
Instead of loading thousands of records at once, retrieve a limited number of records per request.
Authentication
Add user registration and login so users can manage their own data.
Role-Based Access
Administrators could create, update, and delete products while normal users can only view them.
Image Uploads
Allow products to include images.
Dashboard
Create charts and statistics using the stored data.
Notifications
Display success and error messages after CRUD operations.
Responsive Design
Use CSS or a UI framework to make the application work well on mobile devices.
Best Practices for a React and Node.js CRUD Application
A few practices can make your project easier to maintain:
- Keep frontend and backend responsibilities separate.
- Use reusable React components.
- Keep API routes logically organized.
- Validate data on the server.
- Use environment variables for sensitive configuration.
- Return meaningful HTTP status codes.
- Handle API errors gracefully.
- Avoid exposing sensitive information to the frontend.
- Use consistent API response formats.
- Add authentication and authorization before deploying sensitive applications.
Conclusion
Creating a CRUD application with React and Node.js is an excellent project for learning full-stack web development. React provides the interactive frontend, while Node.js and Express.js handle API requests and business logic. MongoDB provides a flexible database for storing application data.
The basic CRUD workflow is straightforward:
Create → POST
Read   → GET
Update → PUT
Delete → DELETE
Once you understand this pattern, you can use the same architecture to build much larger applications such as e-commerce platforms, customer management systems, inventory dashboards, booking systems, employee portals, and SaaS applications.
The most important step is to start with a simple CRUD workflow, understand how data moves between React, the API, and the database, and then gradually add authentication, validation, search, pagination, testing, and production-ready security.
