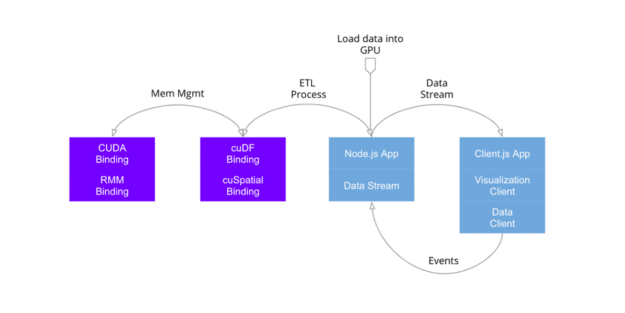
Node.js is a powerful runtime environment that allows you to run JavaScript on the server-side. It provides a range of features and modules that make it easy to build scalable and efficient web applications. One popular use case for Node.js is data visualization, where you can use it to process and manipulate data before rendering it on the client-side.
D3.js is a JavaScript library that provides a wide range of tools for creating interactive and dynamic data visualizations in the browser. It allows you to bind data to the Document Object Model (DOM) and apply transformations to create visually appealing and informative visualizations.
Integrating D3.js with Node.js allows you to take advantage of the server-side capabilities of Node.js to preprocess and transform data before sending it to the client for visualization. This can be particularly useful when dealing with large datasets or when you need to perform complex calculations or data manipulations.
To integrate D3.js with Node.js, you can follow these steps:
1. Install Node.js: If you haven’t already, install Node.js on your machine. You can download it from the official Node.js website and follow the installation instructions.
2. Set up a Node.js project: Create a new directory for your project and navigate to it in your terminal. Run `npm init` to initialize a new Node.js project. This will create a `package.json` file that will keep track of your project’s dependencies.
3. Install D3.js: Install D3.js as a dependency for your project by running `npm install d3` in your terminal. This will download and install the latest version of D3.js in your project’s `node_modules` directory.
4. Create a server: Create a new JavaScript file, for example `server.js`, and require the necessary modules. You can use the built-in `http` module to create a basic HTTP server. Here’s an example of a simple server that serves a static HTML file:
“`javascript
const http = require(‘http’);
const fs = require(‘fs’);
const server = http.createServer((req, res) => {
fs.readFile(‘index.html’, (err, data) => {
if (err) {
res.writeHead(404, { ‘Content-Type’: ‘text/html’ });
res.end(‘404 Not Found’);
} else {
res.writeHead(200, { ‘Content-Type’: ‘text/html’ });
res.end(data);
}
});
});
server.listen(3000, () => {
console.log(‘Server running on http://localhost:3000’);
});
“`
5. Create an HTML file: Create an HTML file, for example `index.html`, that includes the necessary D3.js scripts and defines a container element for your visualization. You can also include any CSS styles or additional JavaScript code that you need. Here’s an example of a simple HTML file that includes D3.js and a container element:
“`html
“`
6. Create a JavaScript file: Create a new JavaScript file, for example `script.js`, that contains your D3.js code. This is where you can use D3.js to load and process data, create visualizations, and handle user interactions. Here’s an example of a simple D3.js script that creates a bar chart:
“`javascript
d3.json(‘data.json’).then(data => {
const svg = d3.select(‘#chart’)
.append(‘svg’)
.attr(‘width’, 500)
.attr(‘height’, 300);
svg.selectAll(‘rect’)
.data(data)
.enter()
.append(‘rect’)
.attr(‘x’, (d, i) => i * 50)
.attr(‘y’, d => 300 – d.value)
.attr(‘width’, 40)
.attr(‘height’, d => d.value)
.attr(‘fill’, ‘steelblue’);
});
“`
7. Start the server: In your terminal, run `node server.js` to start the server. You should see a message indicating that the server is running on `http://localhost:3000`.
8. Open the browser: Open your web browser and navigate to `http://localhost:3000`. You should see your data visualization rendered in the browser.
By integrating D3.js with Node.js, you can leverage the power of both technologies to create dynamic and interactive data visualizations. Node.js allows you to preprocess and