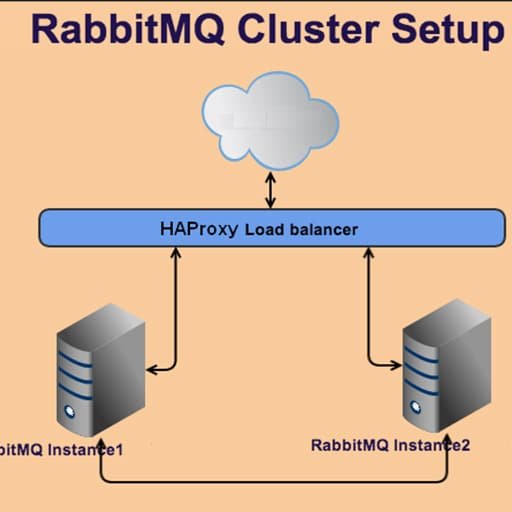
Here is a step-by-step tutorial on how to dockerize a RabbitMQ cluster:
Step 1: Install Docker
– Install Docker on your machine by following the official Docker installation guide for your operating system.
Step 2: Create a Dockerfile
– Create a new directory for your RabbitMQ cluster and navigate to it.
– Create a file named "Dockerfile" (without any file extension) in this directory.
– Open the Dockerfile in a text editor and add the following content:
“`
FROM rabbitmq:3.8.14-management
# Enable the RabbitMQ plugins required for clustering
RUN rabbitmq-plugins enable rabbitmq_management rabbitmq_peer_discovery_aws
# Expose the necessary ports for RabbitMQ
EXPOSE 4369 5671 5672 15671 15672 25672
# Set the environment variables for clustering
ENV RABBITMQ_ERLANG_COOKIE="mysecretcookie"
ENV RABBITMQ_USE_LONGNAME=true
# Copy the custom configuration file
COPY rabbitmq.conf /etc/rabbitmq/
# Start the RabbitMQ server
CMD ["rabbitmq-server"]
“`
Step 3: Create a Custom Configuration File
– In the same directory as the Dockerfile, create a new file named "rabbitmq.conf".
– Open the rabbitmq.conf file in a text editor and add the following content:
“`
cluster_formation.peer_discovery_backend = rabbit_peer_discovery_aws
cluster_formation.aws.region = us-east-1
cluster_formation.aws.access_key_id = YOUR_AWS_ACCESS_KEY
cluster_formation.aws.secret_access_key = YOUR_AWS_SECRET_ACCESS_KEY
cluster_formation.aws.use_autoscaling_group = true
cluster_formation.aws.use_private_ip = true
“`
Replace "YOUR_AWS_ACCESS_KEY" and "YOUR_AWS_SECRET_ACCESS_KEY" with your actual AWS access key and secret access key.
Step 4: Build the Docker Image
– Open a terminal or command prompt and navigate to the directory containing the Dockerfile.
– Run the following command to build the Docker image:
“`
docker build -t rabbitmq-cluster .
“`
Step 5: Run the RabbitMQ Cluster
– Run the following command to start a RabbitMQ cluster with three nodes:
“`
docker run -d –name rabbitmq-node1 -p 5671:5671 -p 5672:5672 -p 15671:15671 -p 15672:15672 -p 25672:25672 -e RABBITMQ_NODENAME=rabbit@node1 -e RABBITMQ_SERVER_ADDITIONAL_ERL_ARGS="-rabbitmq_management listener [{port,15672},{ip,"0.0.0.0"}]" rabbitmq-cluster
docker run -d –name rabbitmq-node2 -p 5673:5671 -p 5674:5672 -p 15673:15671 -p 15674:15672 -p 25673:25672 -e RABBITMQ_NODENAME=rabbit@node2 -e RABBITMQ_SERVER_ADDITIONAL_ERL_ARGS="-rabbitmq_management listener [{port,15672},{ip,"0.0.0.0"}]" rabbitmq-cluster
docker run -d –name rabbitmq-node3 -p 5675:5671 -p 5676:5672 -p 15675:15671 -p 15676:15672 -p 25675:25672 -e RABBITMQ_NODENAME=rabbit@node3 -e RABBITMQ_SERVER_ADDITIONAL_ERL_ARGS="-rabbitmq_management listener [{port,15672},{ip,"0.0.0.0"}]" rabbitmq-cluster
“`
This will start three RabbitMQ nodes named "rabbit@node1", "rabbit@node2", and "rabbit@node3" respectively. The ports are mapped to the host machine to access the RabbitMQ management interface.
Step 6: Verify the Cluster
– Open a web browser and navigate to http://localhost:15672 (replace "localhost" with the IP address or hostname of your machine if running Docker on a remote server).
– Log in with the default credentials (username: "guest", password: "guest").
– You should see the RabbitMQ management interface showing the cluster status and details of the three nodes.
Congratulations! You have successfully dockerized a RabbitMQ cluster. You can now use this cluster for your messaging needs.